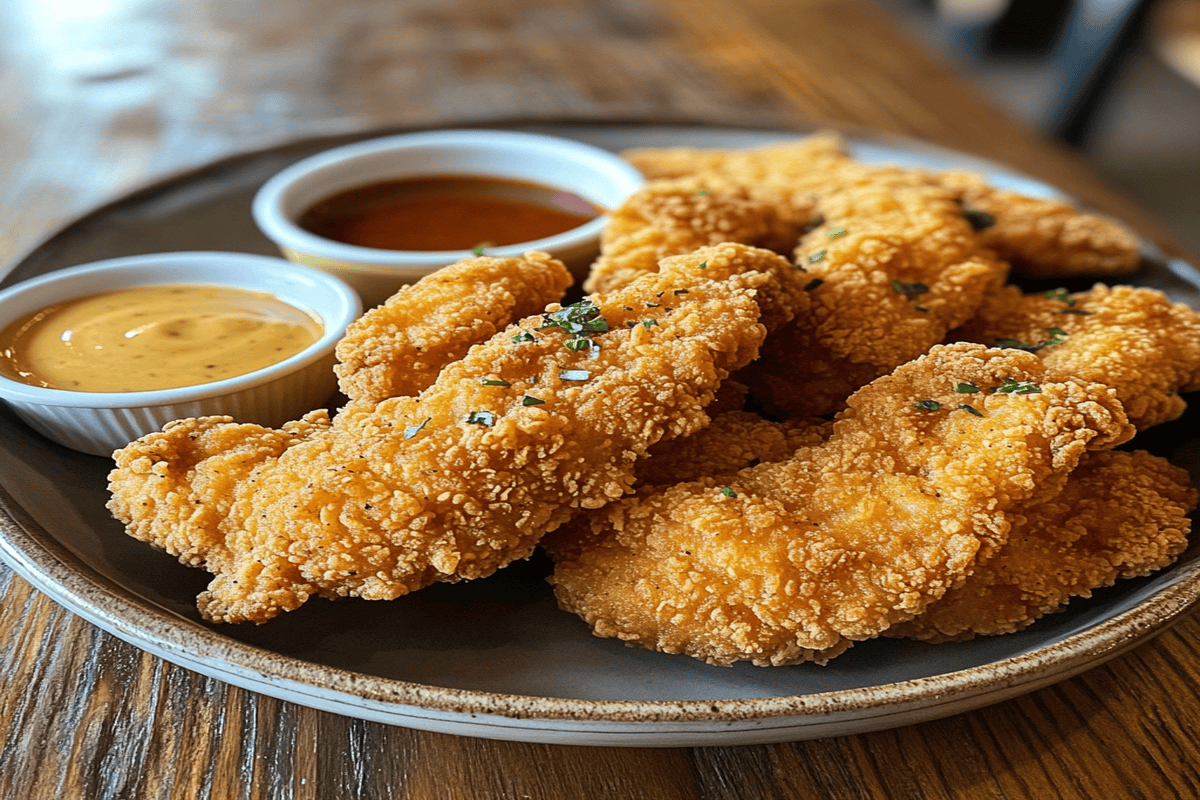
If you’re craving golden, crispy chicken tenders that are tender and juicy inside, this guide is for you. Chicken tenders are a timeless favorite, perfect for snacks, appetizers, or meals. With the right techniques, you can achieve restaurant-quality results right at home.
Learn how to enhance your crispy coating with tips like those in why is salted caramel so good to achieve perfectly balanced flavors. For an even crunchier coating, explore how to toast breadcrumbs, which is essential for baked variations.
Why Are Chicken Tenders So Popular?
Universal Appeal
Chicken tenders are loved for their simplicity and versatility. From kids to adults, they are a universally enjoyed comfort food.
A Crunchy Masterpiece
The secret lies in the crispy breading. It’s essential to understand techniques like double breading, which we’ll explore further, and learn how to achieve maximum crispiness, as seen in cheesy garlic butter linguine pasta recipes, which also use rich textures to elevate the dish.
For health-conscious cooks, consider the benefits of air frying. Learn more with this comprehensive air fryer guide.
The Secret to Perfectly Juicy Chicken
The key to making crispy chicken tenders isn’t just about the coating—it’s also about keeping the meat tender and juicy. One of the best ways to achieve this is by using a buttermilk marinade. The acidity in buttermilk helps break down proteins in the chicken, resulting in a softer, more flavorful bite.
If you don’t have buttermilk, you can create a simple substitute by mixing milk with lemon juice or vinegar. Let the chicken soak for at least 30 minutes, but if you have time, marinating it for a few hours will enhance the flavor even more.
Another trick is to let the chicken come to room temperature before frying. Cold chicken straight from the fridge can cause the oil temperature to drop, leading to greasy tenders instead of crispy ones.
Key Ingredients for Crispy Chicken Tenders
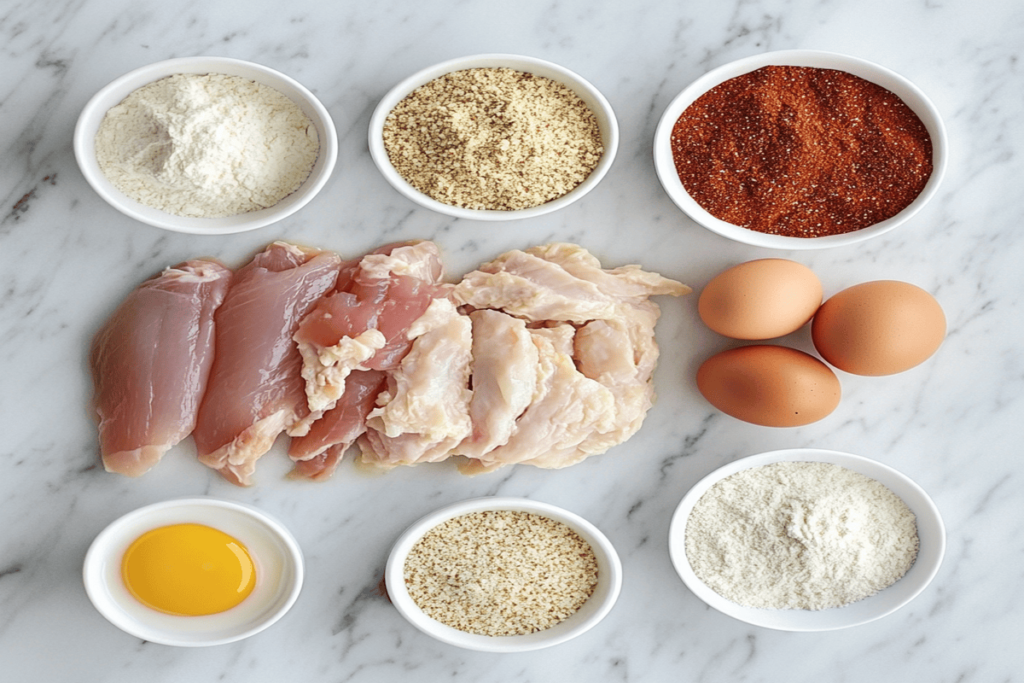
Core Ingredients
- Chicken Tenders: Use fresh or frozen tenders for the best results.
- Flour: A base for the breading.
- Breadcrumbs or Panko: To create the signature crispy coating.
- Eggs: Helps the breading stick.
- Seasonings: Garlic powder, paprika, cayenne, salt, and pepper.
Optional Additions
- Buttermilk: Marinate chicken for enhanced flavor.
- Herbs: Add fresh parsley or oregano for a twist.
For more ingredient insights, you might enjoy Kaitlyn’s breakdown of salted vs. unsalted butter in cupcakes.
Tools You’ll Need
- Deep fryer or heavy-bottomed pan.
- Tongs for safe handling.
- Thermometer to monitor oil temperature.
Step-by-Step Recipe: Classic Fried Chicken Tenders
1. Prepare the Ingredients
- Slice chicken into uniform strips if not using tenders.
- Set up a breading station:
- Bowl 1: Seasoned flour.
- Bowl 2: Beaten eggs.
- Bowl 3: Breadcrumbs or panko.
2. Optional Buttermilk Marinade
- Soak the chicken in seasoned buttermilk for 1–2 hours. This step enhances flavor and tenderness.
3. Breading Process
- Coat chicken in flour, dip into eggs, and then press into breadcrumbs. Repeat for double breading if desired.

Mastering the Breading Process
A great breading technique is what separates average chicken tenders from crispy, golden perfection. The classic three-step breading method—flour, egg, and breadcrumbs—ensures a thick, even coating that clings to the chicken.
For extra crunch, try a double breading technique. After coating the chicken in flour, dip it back into the egg mixture before pressing it into the breadcrumbs again. This creates an even crispier, textured crust.
Using panko breadcrumbs instead of regular breadcrumbs is another game-changer. Panko is lighter and airier, making the coating crispier and preventing it from becoming too dense.
4. Frying
- Heat oil to 350°F. Fry chicken in batches for 3–4 minutes per side until golden.
Use neutral oils like canola or vegetable oil for frying. For detailed advice, check out this guide to the best fryingoils.
The Best Oil for Frying Chicken Tenders
Choosing the right oil for frying is just as important as the breading. The best oils are those with a high smoke point, meaning they can handle high temperatures without burning. Vegetable oil, canola oil, and peanut oil are all excellent choices.
Avoid using butter or olive oil, as they have lower smoke points and can burn easily, leaving an unpleasant aftertaste. Maintaining the right oil temperature—around 350°F (175°C)—is also key. Too hot, and the breading burns before the inside cooks. Too cold, and the tenders absorb too much oil, making them greasy.
A kitchen thermometer is the best way to ensure your oil stays at the right temperature. If you don’t have one, test the oil by dropping in a small breadcrumb—if it sizzles immediately, the oil is ready!
Why Resting Your Chicken Matters
Most people want to dig into their chicken tenders as soon as they come out of the fryer, but letting them rest for a few minutes is an important step. Resting allows the juices inside the chicken to redistribute, keeping the tenders moist and flavorful.
If you cut into them too soon, the juices escape, leaving you with dry chicken. Instead, place the cooked tenders on a wire rack over a baking sheet. This prevents them from getting soggy, unlike resting them directly on a paper towel.
For an extra crispy finish, you can even place the tenders in a warm oven (200°F/95°C) for a few minutes while you finish frying the rest. This keeps them hot and crunchy without overcooking them.
Variations to Try
Oven-Baked Tenders
- Toast breadcrumbs in the oven before breading for extra crunch.
Reference how to toast breadcrumbs for step-by-step instructions. - Bake at 400°F for 15–20 minutes.
How to Make Crispy Chicken Tenders in the Oven
If you prefer to avoid frying, baking your chicken tenders can still give you a deliciously crispy result. The trick is to pre-toast your breadcrumbs before coating the chicken.
Simply spread panko breadcrumbs on a baking sheet and bake them at 375°F (190°C) for 5-7 minutes until golden brown. This gives them a head start on crisping up before they even go on the chicken.
When baking, use a wire rack placed over a baking sheet instead of placing the tenders directly on the pan. This allows hot air to circulate around the chicken, cooking it evenly on all sides. Bake at 400°F (200°C) for 15-20 minutes, flipping halfway through for the best texture.
Air-Fried Tenders
- Lightly spray breaded tenders with oil.
- Air fry at 375°F for 10–12 minutes, shaking halfway through.
- Explore air fryer tips and tricks for consistent results.
The Benefits of Air Frying Chicken Tenders
Air frying has become one of the most popular ways to make crispy chicken tenders with less oil while still achieving a golden crunch. The key is to lightly spray the breaded tenders with cooking oil before placing them in the air fryer.
Set the air fryer to 375°F (190°C) and cook for 10-12 minutes, flipping the tenders halfway through. Because air fryers use rapid hot air circulation, the tenders get crispy on the outside while remaining juicy inside.
Another benefit of air frying is that it reduces calories and fat without sacrificing flavor. It’s a great option for those who want to enjoy crispy chicken tenders in a healthier way.
Spicy Tenders
- Add cayenne or chili powder to the breading for a fiery kick.
Pairing Suggestions
Dips
- Ranch, BBQ sauce, honey mustard, and blue cheese are classics.
The Best Dips for Chicken Tenders
No chicken tender meal is complete without a delicious dipping sauce. Whether you prefer something creamy, tangy, or spicy, there’s a perfect dip for every taste.
Classic options include ranch, honey mustard, BBQ sauce, and buffalo sauce, each bringing its own unique flavor to the table. For something more adventurous, try garlic aioli, chipotle mayo, or sriracha ketchup for a spicy kick.
If you love a hint of sweetness with your tenders, honey or maple syrup can add a surprisingly delicious contrast to the crispy, savory coating. Experimenting with different dips is one of the best ways to customize your meal!
Sides
- Pair with fresh salads, fries, or even something sweet, like salted caramel cupcakes.
FAQs About Crispy Chicken Tenders
Can I Make Chicken Tenders Ahead of Time?
Yes! Bread tenders in advance and refrigerate for up to 4 hours before frying.
How Do I Store Leftovers?
Store in an airtight container in the fridge for 3 days. Reheat in the oven or air fryer.
How to Store and Reheat Chicken Tenders
Crispy chicken tenders taste best fresh, but you can still enjoy leftovers if you store them properly. Place any uneaten tenders in an airtight container and refrigerate them for up to 3 days.
When reheating, avoid the microwave—it makes the breading soggy. Instead, reheat them in an oven at 375°F (190°C) for 10 minutes or in an air fryer for 5 minutes to restore their crispiness.
If you want to freeze cooked tenders, let them cool completely before placing them in a freezer-safe container. They can be stored for up to 2 months. Reheat from frozen in the oven for 15-20 minutes at 375°F.
What Oil Is Best for Frying?
Neutral oils like vegetable or canola work best. For frying tips, refer to this guide to the best frying oils.
Conclusion
Crispy chicken tenders are a versatile, crowd-pleasing dish. By mastering breading techniques and exploring variations, you can create tenders that are as unique as they are delicious. Whether you prefer frying, baking, or air frying, this guide has everything you need.
For more ideas, check out Kaitlyn’s cheesy garlic butter linguine pasta recipe for another comforting favorite. Don’t wait—try this recipe today and impress everyone with your crispy chicken tenders!